> ## Documentation Index
> Fetch the complete documentation index at: https://support.stuut.ai/llms.txt
> Use this file to discover all available pages before exploring further.
# Sage Intacct
> Complete configuration guide for connecting Sage Intacct to Stuut.
This guide walks through the complete setup process to integrate Sage Intacct with Stuut's AI-powered accounts receivable platform. The integration requires configuration in both Sage Intacct and Stuut.
**Estimated time:** 15–20 minutes
## Prerequisites
Before beginning, ensure you have:
* **Administrative access** to your Sage Intacct account
* **Access to your Stuut account** with connector permissions
* **Web Services enabled** in your Sage Intacct subscription (Company → Admin → Subscriptions)
Sage Intacct requires a Web Services developer license (sender ID and password) for API integrations. If you don't have these credentials, contact your Sage Intacct account manager. Stuut uses the authorized client ID `714f94ad79c8059eb934.app.sage.com` for secure OAuth connections.
## Part 1: Sage Intacct configuration
### Step 1: Configure Web Services authorization
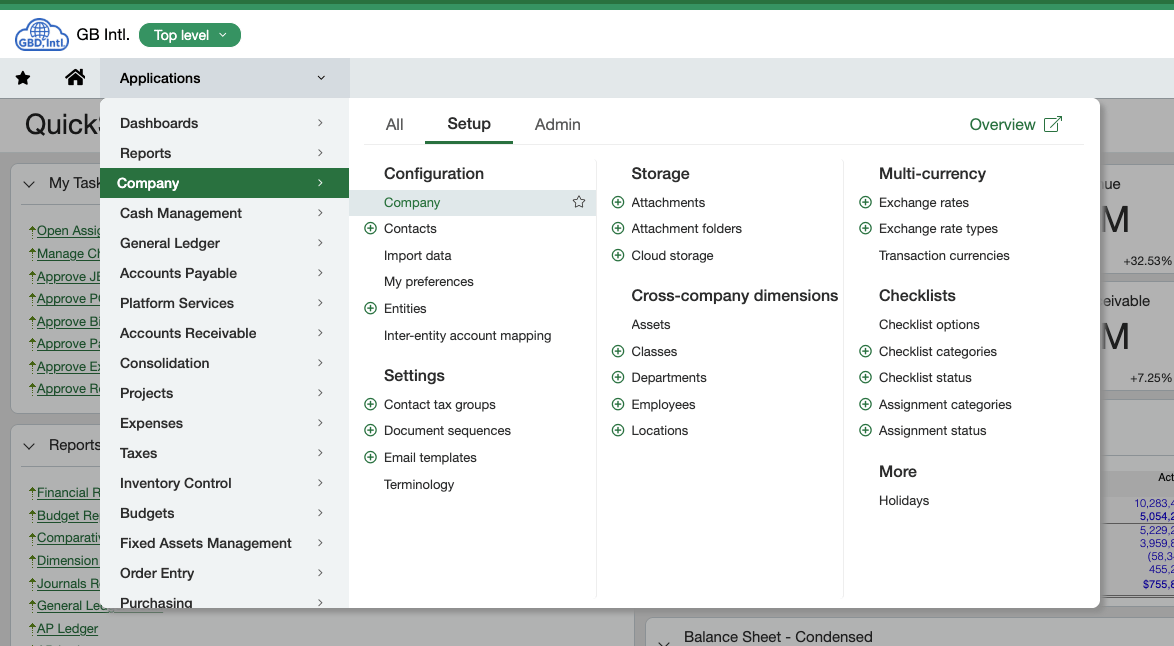
Navigate to Company settings:
1. Click **Applications** in the top menu
2. Select **Company** from the dropdown
3. Go to the **Setup** tab
4. Click **Company** under Configuration
 5. Click the **Edit** button
 In the **Security** tab, configure Web Services access:
 1. Scroll to **Web Services authorizations**
2. Click **Add**
1. Scroll to **Web Services authorizations**
2. Click **Add**
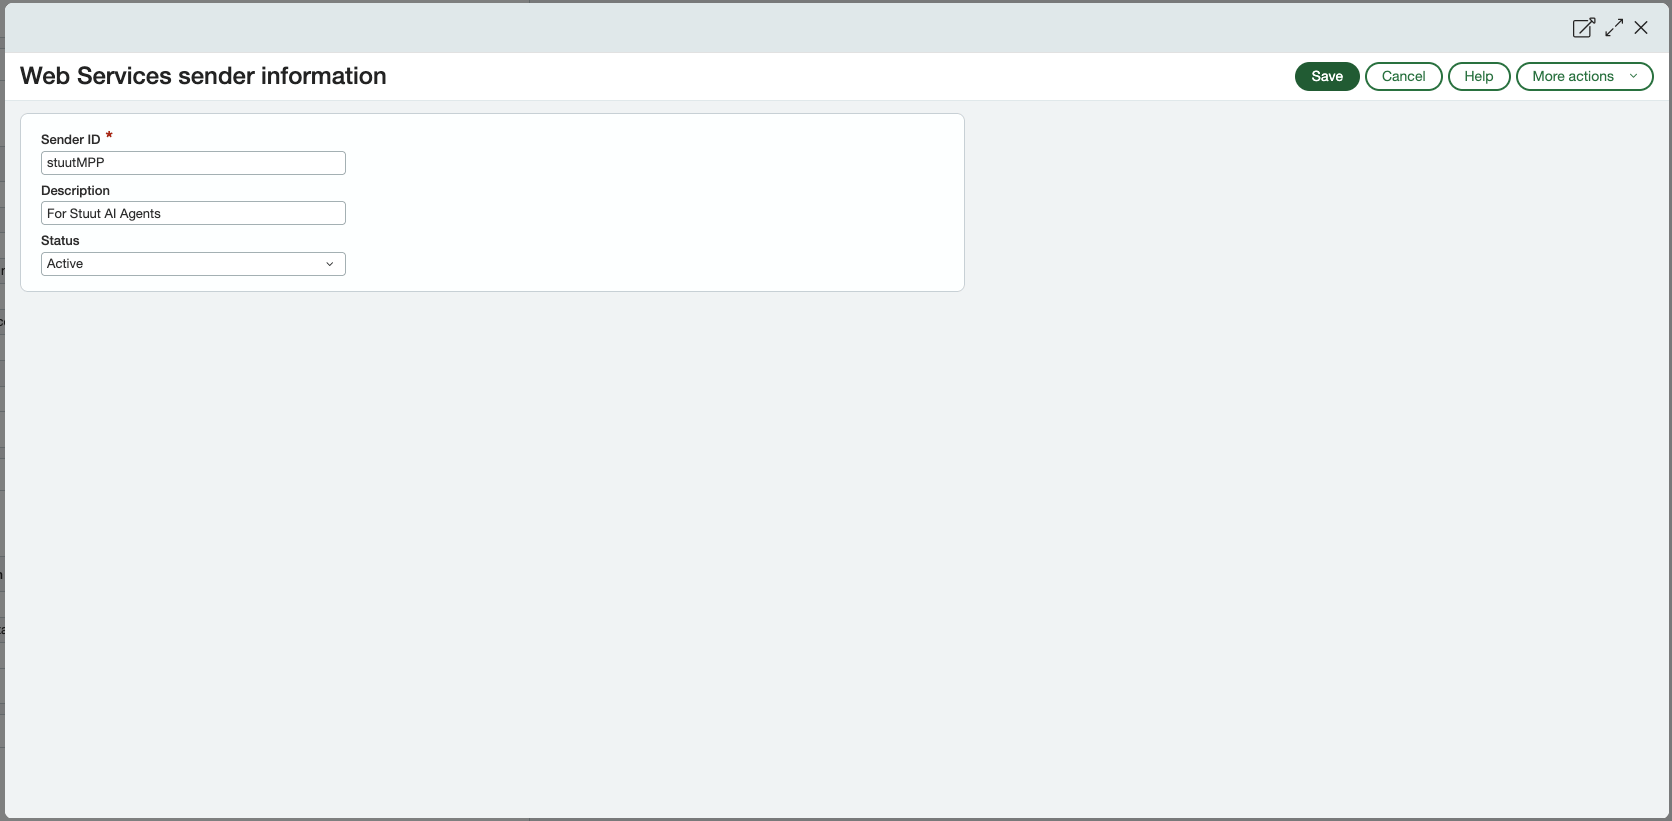
 3. Enter the following:
* **Sender ID:** `stuutMPP`
* **Description:** For Stuut AI Agents
* **Status:** Active
4. Click **Save**
3. Enter the following:
* **Sender ID:** `stuutMPP`
* **Description:** For Stuut AI Agents
* **Status:** Active
4. Click **Save**
 ### Step 2: Authorize the Stuut client application
Still in the **Security** tab:
1. Scroll to **Authorized client applications**
2. Click **Add**
### Step 2: Authorize the Stuut client application
Still in the **Security** tab:
1. Scroll to **Authorized client applications**
2. Click **Add**
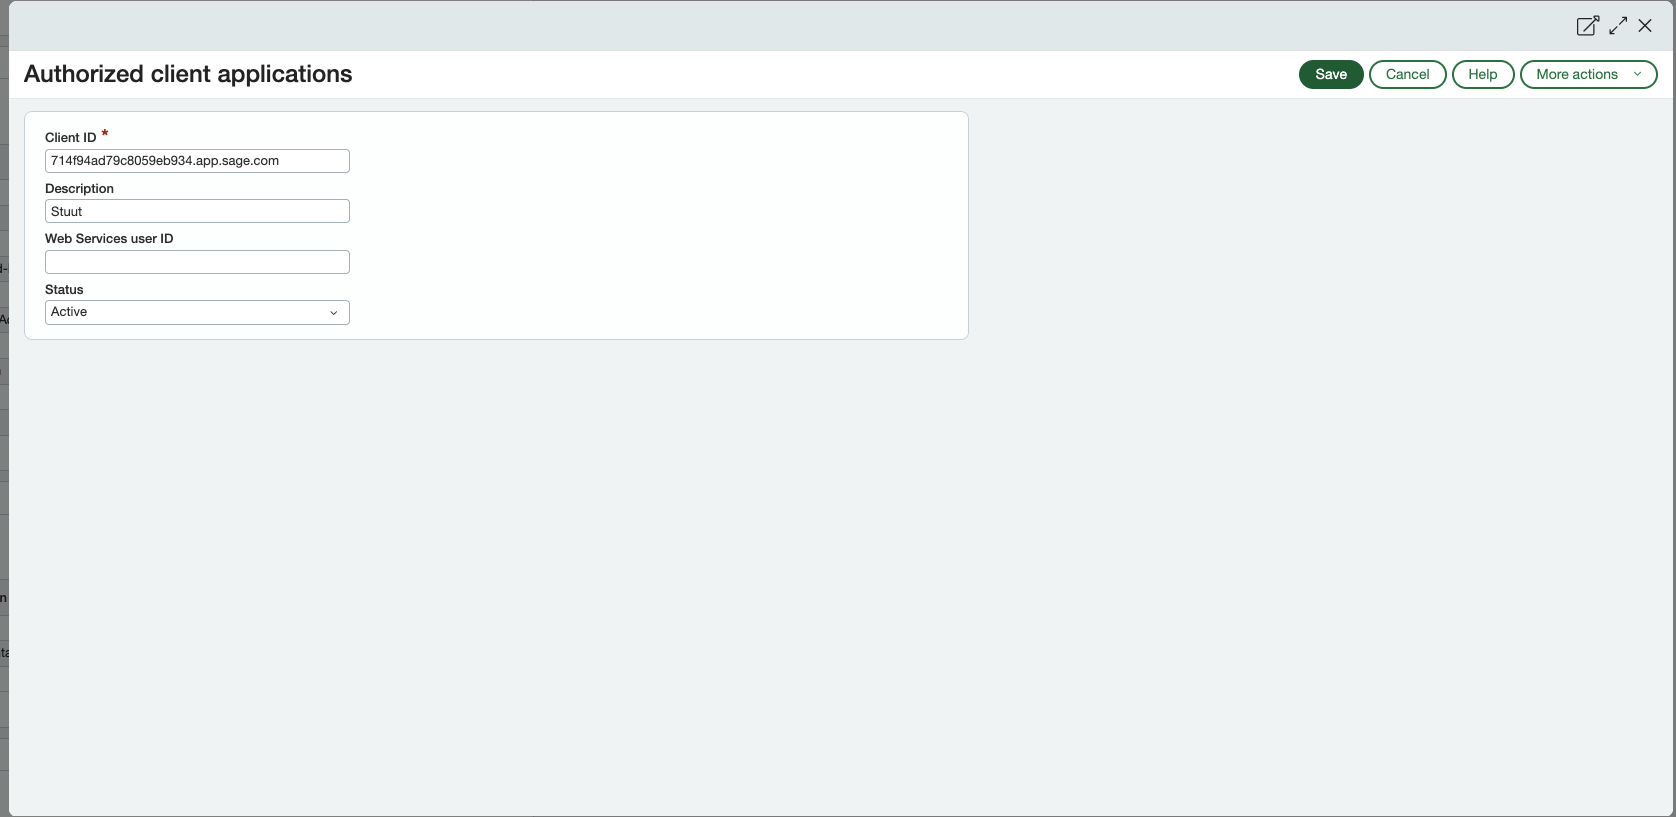
 3. Enter the following:
* **Client ID:** `714f94ad79c8059eb934.app.sage.com`
* **Description:** Stuut
* **Status:** Active
4. Click **Save**
5. Click **Done** to exit Company settings
3. Enter the following:
* **Client ID:** `714f94ad79c8059eb934.app.sage.com`
* **Description:** Stuut
* **Status:** Active
4. Click **Save**
5. Click **Done** to exit Company settings
 ### Step 3: Create the Stuut role
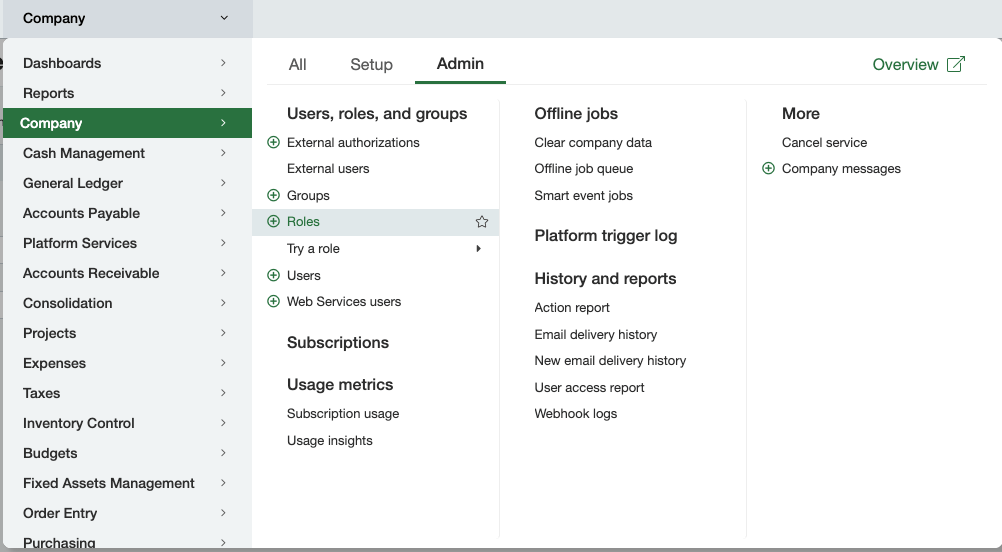
Navigate to role management:
1. Click **Company** in the top menu
2. Select the **Admin** tab
3. Under "Users, roles, and groups", click **Roles**
### Step 3: Create the Stuut role
Navigate to role management:
1. Click **Company** in the top menu
2. Select the **Admin** tab
3. Under "Users, roles, and groups", click **Roles**
 4. Click **Add**
5. Create the role:
* **Name:** `stuut`
* **Description:** Role for Stuut AI Agent
6. Click **Save**
4. Click **Add**
5. Create the role:
* **Name:** `stuut`
* **Description:** Role for Stuut AI Agent
6. Click **Save**
 ### Step 4: Configure role permissions (subscriptions)
After creating the role, subscribe it to the required modules. Check these four modules:
* ☑ **Company**
* ☑ **Accounts Receivable**
* ☑ **Order Entry**
* ☑ **General Ledger**
All four modules are required for Stuut to function properly.
For each checked module, click **Permissions** and configure the specific access rights below, clicking **Save** after each module.
| Module | Permissions |
| ----------------------- | ------------------------------------------------------------------------------------------------------------------------------ |
| **Company** | Attachments: ☑ List, ☑ View |
| **Accounts Receivable** | Adjustments: ☑ List, ☑ View · Customers: ☑ List, ☑ View · Invoices: ☑ List, ☑ View · Transactions → AR Payment: ☑ List, ☑ View |
| **Order Entry** | Contacts: ☑ List, ☑ View |
| **General Ledger** | Accounts: ☑ List, ☑ View |
### Step 5: Create a Web Services user
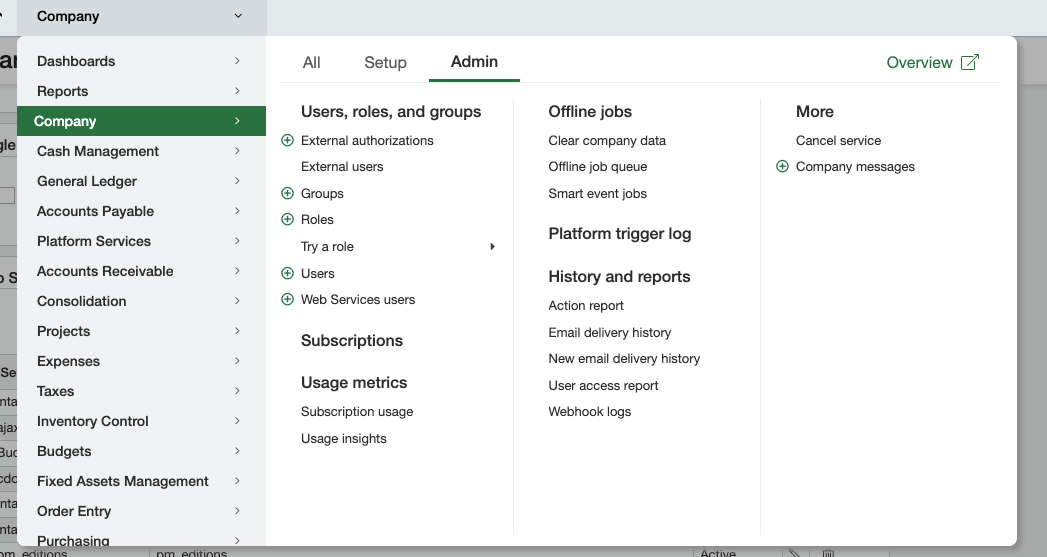
1. Go to **Company** → **Admin** tab
2. Under "Users, roles, and groups", click **Web Services users**
### Step 4: Configure role permissions (subscriptions)
After creating the role, subscribe it to the required modules. Check these four modules:
* ☑ **Company**
* ☑ **Accounts Receivable**
* ☑ **Order Entry**
* ☑ **General Ledger**
All four modules are required for Stuut to function properly.
For each checked module, click **Permissions** and configure the specific access rights below, clicking **Save** after each module.
| Module | Permissions |
| ----------------------- | ------------------------------------------------------------------------------------------------------------------------------ |
| **Company** | Attachments: ☑ List, ☑ View |
| **Accounts Receivable** | Adjustments: ☑ List, ☑ View · Customers: ☑ List, ☑ View · Invoices: ☑ List, ☑ View · Transactions → AR Payment: ☑ List, ☑ View |
| **Order Entry** | Contacts: ☑ List, ☑ View |
| **General Ledger** | Accounts: ☑ List, ☑ View |
### Step 5: Create a Web Services user
1. Go to **Company** → **Admin** tab
2. Under "Users, roles, and groups", click **Web Services users**
 3. Click **Add**
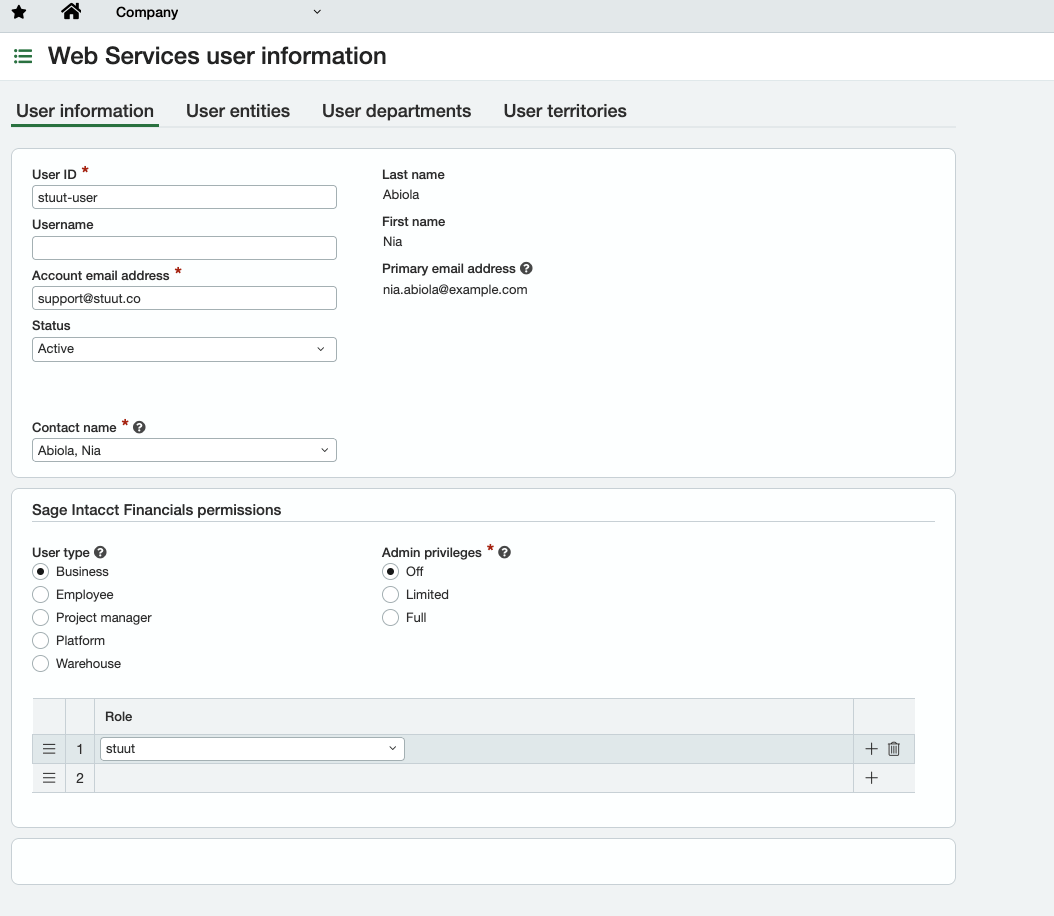
4. Configure the user:
* **User ID:** choose an appropriate ID (e.g., `stuut_api`)
* **Email:** email address of the person responsible for the integration
* **Contact:** contact name
* **Role:** select **stuut** (the role created in Step 3)
* **Status:** Active
5. Click **Save**
3. Click **Add**
4. Configure the user:
* **User ID:** choose an appropriate ID (e.g., `stuut_api`)
* **Email:** email address of the person responsible for the integration
* **Contact:** contact name
* **Role:** select **stuut** (the role created in Step 3)
* **Status:** Active
5. Click **Save**
 ### Step 6: Link the Web Services user to the client application
Return to the authorized client application:
1. Navigate to **Company → Setup → Company → Edit**
2. Go to the **Security** tab
3. Find the Stuut authorized client application
4. Add the Web Services **User ID** you created in Step 5
5. Click **Save**
## Part 2: Stuut configuration
### Step 7: Connect Sage Intacct to Stuut
1. Sign in to your Stuut account at [dashboard.stuut.co](https://dashboard.stuut.co)
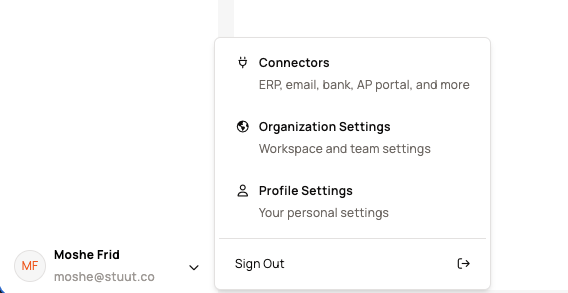
2. Click your **user profile** in the bottom-left corner
3. Select **Connectors** from the menu
### Step 6: Link the Web Services user to the client application
Return to the authorized client application:
1. Navigate to **Company → Setup → Company → Edit**
2. Go to the **Security** tab
3. Find the Stuut authorized client application
4. Add the Web Services **User ID** you created in Step 5
5. Click **Save**
## Part 2: Stuut configuration
### Step 7: Connect Sage Intacct to Stuut
1. Sign in to your Stuut account at [dashboard.stuut.co](https://dashboard.stuut.co)
2. Click your **user profile** in the bottom-left corner
3. Select **Connectors** from the menu
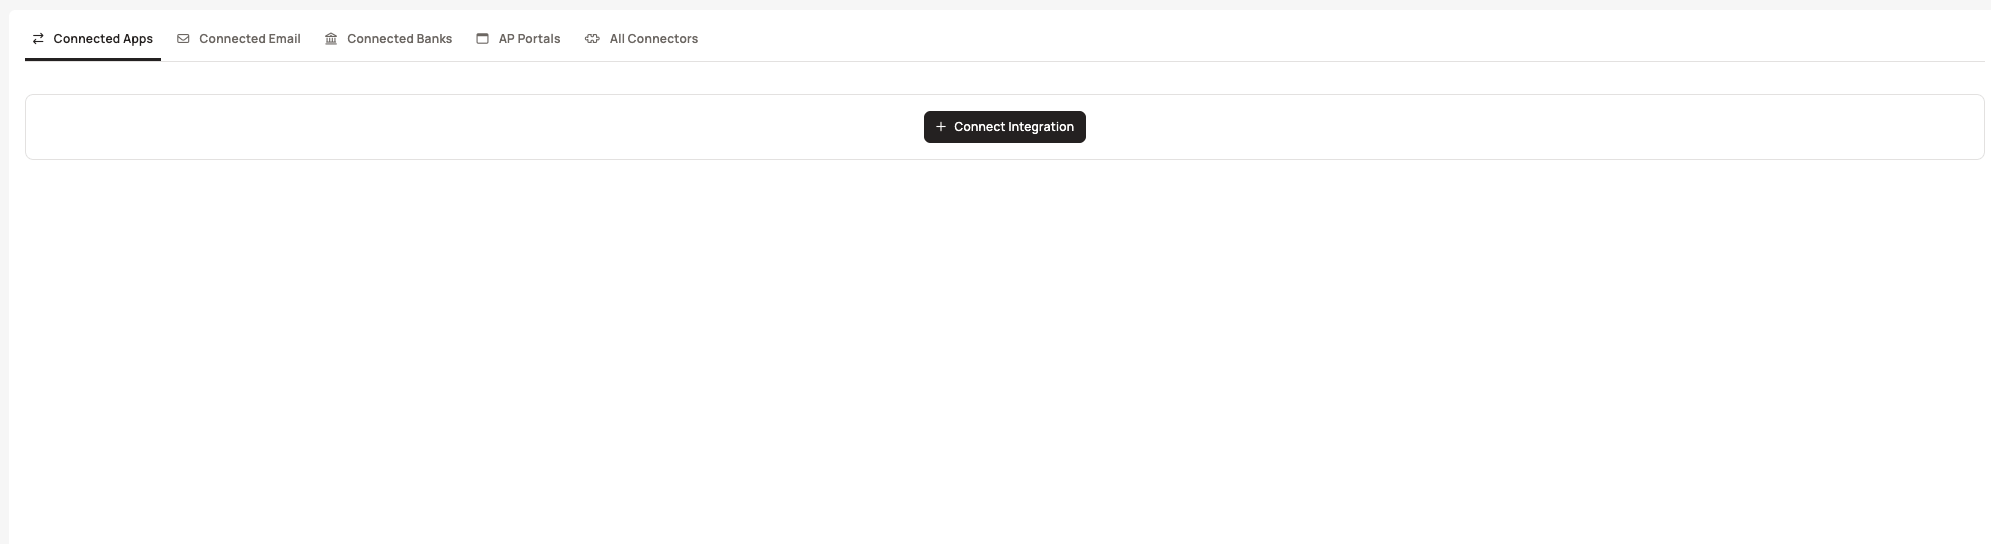
 4. Click **Connect Integration**
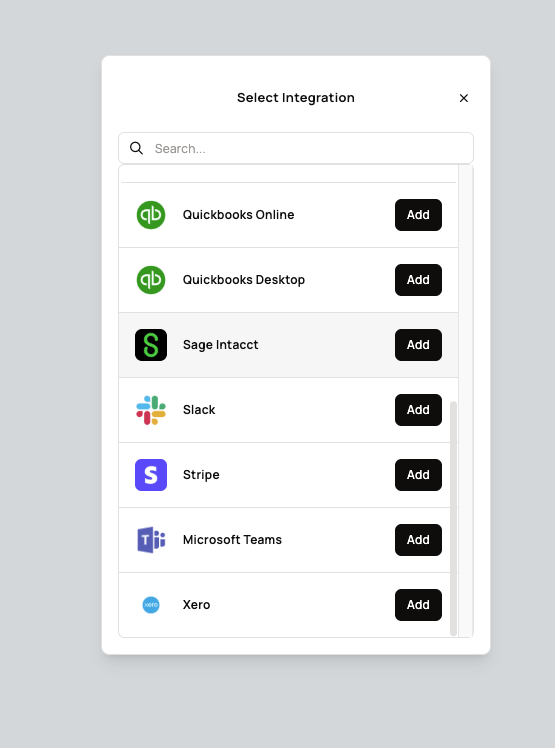
 5. Select **Sage Intacct** from the available integrations and click **Add**
 ### Step 8: Authenticate
When prompted:
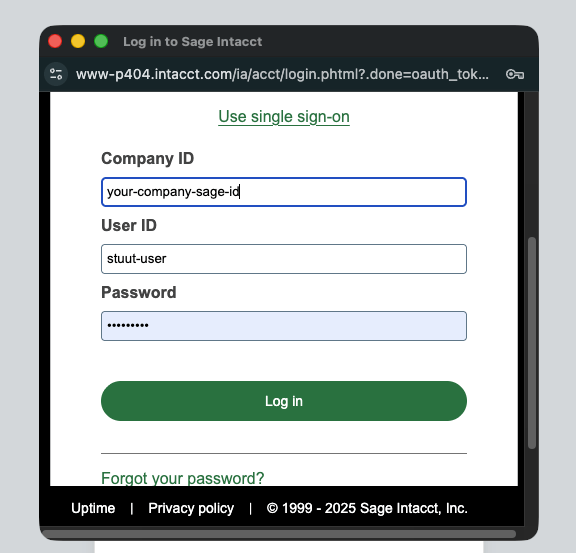
1. Sign in with the Sage Intacct credentials for the Web Services user (an email was sent to the user specified in Step 5)
2. Authorize Stuut to access your Sage Intacct data
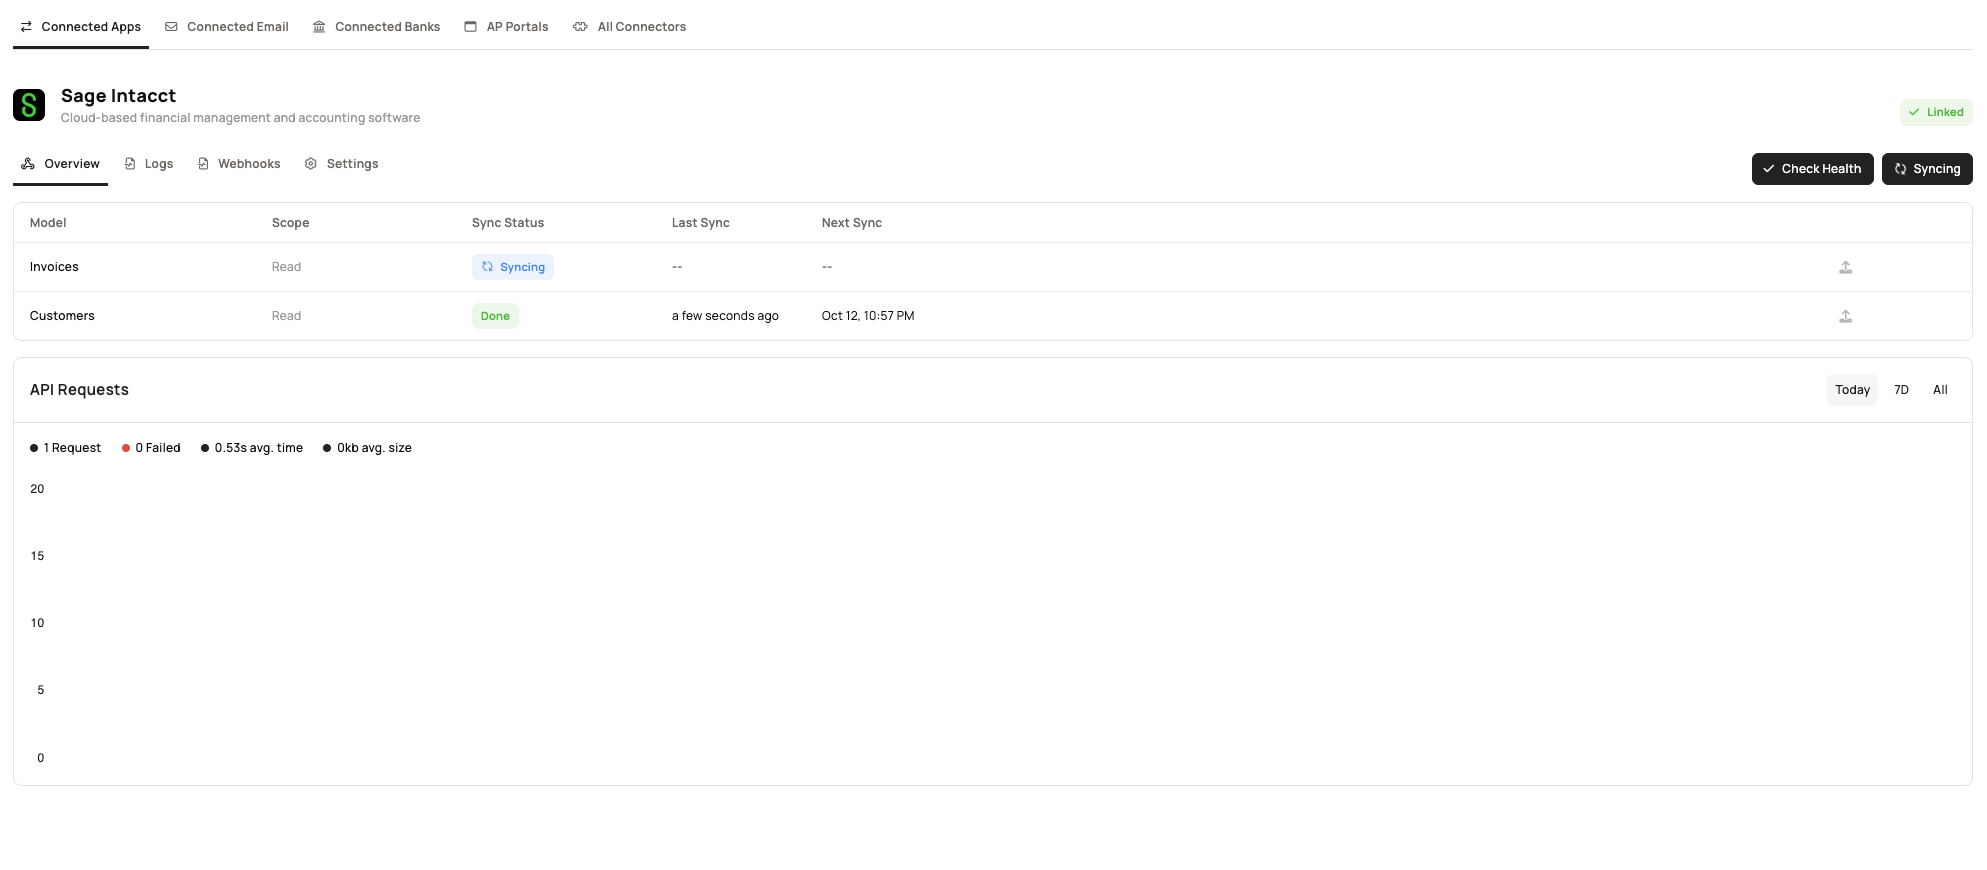
3. Synchronization starts automatically once connected
### Step 8: Authenticate
When prompted:
1. Sign in with the Sage Intacct credentials for the Web Services user (an email was sent to the user specified in Step 5)
2. Authorize Stuut to access your Sage Intacct data
3. Synchronization starts automatically once connected
 ## Troubleshooting
If you encounter any issues during setup or operation:
* Verify all IDs and settings match exactly as shown in the screenshots
* Ensure the Web Services user has been assigned to the correct **stuut** role
* Check that all permissions are properly configured for the role
* Confirm the authorized client application has the correct Client ID: `714f94ad79c8059eb934.app.sage.com`
* Verify that the Web Services user ID has been added to the authorized client application
* Check that all statuses are set to **Active**
Still stuck? Contact [support@stuut.co](mailto:support@stuut.co).
## Troubleshooting
If you encounter any issues during setup or operation:
* Verify all IDs and settings match exactly as shown in the screenshots
* Ensure the Web Services user has been assigned to the correct **stuut** role
* Check that all permissions are properly configured for the role
* Confirm the authorized client application has the correct Client ID: `714f94ad79c8059eb934.app.sage.com`
* Verify that the Web Services user ID has been added to the authorized client application
* Check that all statuses are set to **Active**
Still stuck? Contact [support@stuut.co](mailto:support@stuut.co).